Unlock the Secret to Deep Flavor: Your Ultimate Guide to Homemade Turkey Stock
After the last delicious morsel of holiday turkey has been devoured, you're often left with a substantial, picked-clean carcass. While some might see it as kitchen waste, savvy home cooks recognize it for what it truly is: a golden opportunity. That turkey carcass is the foundation for arguably the most flavorful, nutritious, and versatile ingredient you can make: homemade turkey stock. Forget bland, store-bought cartons – crafting your own liquid gold from scratch is surprisingly simple and yields results that will elevate your cooking to new heights. This comprehensive guide will walk you through both stovetop and slow cooker methods, ensuring you can harness every bit of flavor from your holiday bird.
Why Homemade Turkey Stock is a Culinary Must-Have
The thought of transforming a bare turkey carcass into a culinary staple might seem like an extra chore, especially after a big meal. However, the benefits of making homemade turkey stock far outweigh the minimal effort involved. It's not just about economy; it's about unlocking unparalleled depth of flavor and making the most of your resources.
- Unmatched Flavor Profile: Store-bought stocks, even high-quality ones, simply can't compete with the rich, nuanced flavor of homemade. As the bones, cartilage, and any residual meat slowly simmer, they release collagen, gelatin, and a spectrum of savory compounds. This results in a stock with incredible body, a velvety mouthfeel, and a deeply roasted, umami taste that forms the perfect base for countless dishes.
- Nutritional Powerhouse: Beyond taste, simmering bones extracts valuable minerals like calcium, magnesium, phosphorus, and beneficial amino acids. The gelatin, derived from collagen, is lauded for its potential gut-healing properties and benefits for joint health, hair, skin, and nails. You're not just making stock; you're creating a nourishing elixir.
- The Ultimate Zero-Waste Practice: In an age where sustainability is key, utilizing every part of your turkey is a smart and eco-friendly choice. Instead of discarding the carcass, you transform a potential waste product into a valuable ingredient, maximizing your investment in the holiday bird. To learn more about how to make the most of your leftovers, check out our guide: Maximize Leftovers: Transform Your Turkey Carcass into Stock.
- Cost-Effective Cooking: Good quality stock can be expensive. By making your own from a "free" carcass, you're saving money while simultaneously enhancing your kitchen's repertoire with a premium ingredient.
- Complete Ingredient Control: When you make stock at home, you dictate exactly what goes into it. No hidden additives, excessive sodium, or artificial flavors. You control the purity and quality, ensuring it aligns perfectly with your dietary preferences and culinary vision.
Gathering Your Ingredients: Beyond the Carcass
The beauty of homemade turkey stock lies in its simplicity and flexibility. While the turkey carcass is non-negotiable, the accompanying aromatics and herbs are incredibly forgiving. Think of this as an opportunity to clean out your produce drawer or use up those leftover Thanksgiving prep scraps.
- The Turkey Carcass: This is your star ingredient. Ensure it's been mostly picked clean of meat, but don't fret over every last shred – those little bits contribute to the flavor. Any turkey parts you don't typically eat, such as the neck, giblets (excluding the liver, which can make stock bitter), and wing tips, are excellent additions for extra richness.
- Aromatics (The Flavor Foundation):
- Onions: A large onion, quartered. No need to peel, as the skin adds a lovely golden color to your stock.
- Carrots: 2-3 medium carrots, roughly chopped. Again, a quick scrub is fine; no need for meticulous peeling.
- Celery: 2-3 celery stalks, roughly chopped. Include the leaves if you have them – they're packed with flavor.
- Tip: For convenience, save your vegetable scraps (onion peels, carrot ends, celery tops) in a freezer bag throughout the year, and they'll be ready for stock day!
- Herbs & Spices (The Fragrant Finish):
- Fresh Parsley: A handful of fresh parsley sprigs.
- Bay Leaves: 2-3 dried bay leaves.
- Whole Black Peppercorns: 1 teaspoon. Avoid ground pepper, which can make your stock cloudy.
- Optional Herbs: Sprigs of fresh thyme and sage are fantastic additions, especially if you have leftovers from your holiday roast.
- Water: Approximately 1 gallon for a full turkey carcass. The goal is to just cover all your ingredients. Use less if you're only working with a smaller turkey breast carcass or a partial frame.
- A Note on Salt: Crucially, do not add salt at the beginning. If your turkey was brined before cooking, there will be residual salt in the carcass and bones. Adding more salt now risks an overly salty stock. It's always easier to add salt later than to remove it. You can adjust the seasoning after the stock is finished, cooled, and degreased.
Step-by-Step Guide to Crafting Your Homemade Turkey Stock
Whether you prefer the traditional stovetop method or the hands-off convenience of a slow cooker, the process of making homemade turkey stock is incredibly straightforward. The key is gentle simmering over an extended period to extract maximum flavor.
The Stovetop Method: Classic & Robust
The stovetop offers excellent control over the simmering process, allowing for rich flavor development.
- Preparation: If your turkey carcass is too large for your stockpot, gently break it into smaller pieces. Place the carcass and any giblets (excluding the liver) into your largest stockpot.
- Add Aromatics and Herbs: Add the chopped carrots, celery, onion, parsley, bay leaves, and whole peppercorns to the pot.
- Cover with Water: Pour enough cold water over all the ingredients to cover them completely, typically around 1 gallon for a standard turkey carcass.
- Bring to a Gentle Simmer: Place the pot over medium-high heat and bring it to a bare simmer. As it heats, you might see some foam or scum rise to the surface. Skim this off with a spoon and discard it; this helps keep your stock clear.
- Simmer Slowly: Once simmering, reduce the heat to the lowest possible setting. The goal is a very gentle simmer, with just a few bubbles breaking the surface. Cover the pot partially, leaving a small gap for steam to escape.
- Cook for Hours: Allow the stock to simmer for at least 6 hours, or ideally 8-12 hours. For an even richer stock and to extract every last bit of collagen from the bones, you can simmer it for up to 24 hours. Check periodically and add more water if necessary to keep the ingredients submerged, especially during longer simmers.
The Slow Cooker Method: Hands-Off & Convenient
For minimal fuss and an overnight cooking solution, the slow cooker is an excellent choice.
- Preparation: Break the turkey carcass into pieces if needed to fit into your slow cooker. Place the carcass and any giblets into the slow cooker pot.
- Add Aromatics and Herbs: Add the chopped carrots, celery, onion, parsley, bay leaves, and whole peppercorns.
- Cover with Water: Pour cold water over the ingredients until they are just covered. Be mindful not to exceed the "max fill" line of your slow cooker.
- Cook on Low: Cover the slow cooker and set it to the "low" setting. Let it cook for 12-24 hours. The slow, consistent heat of the slow cooker is perfect for extracting all those wonderful flavors and nutrients without much evaporation.
Straining and Cooling: The Final Touches
These last steps are crucial for a clear, safe, and easily storable stock.
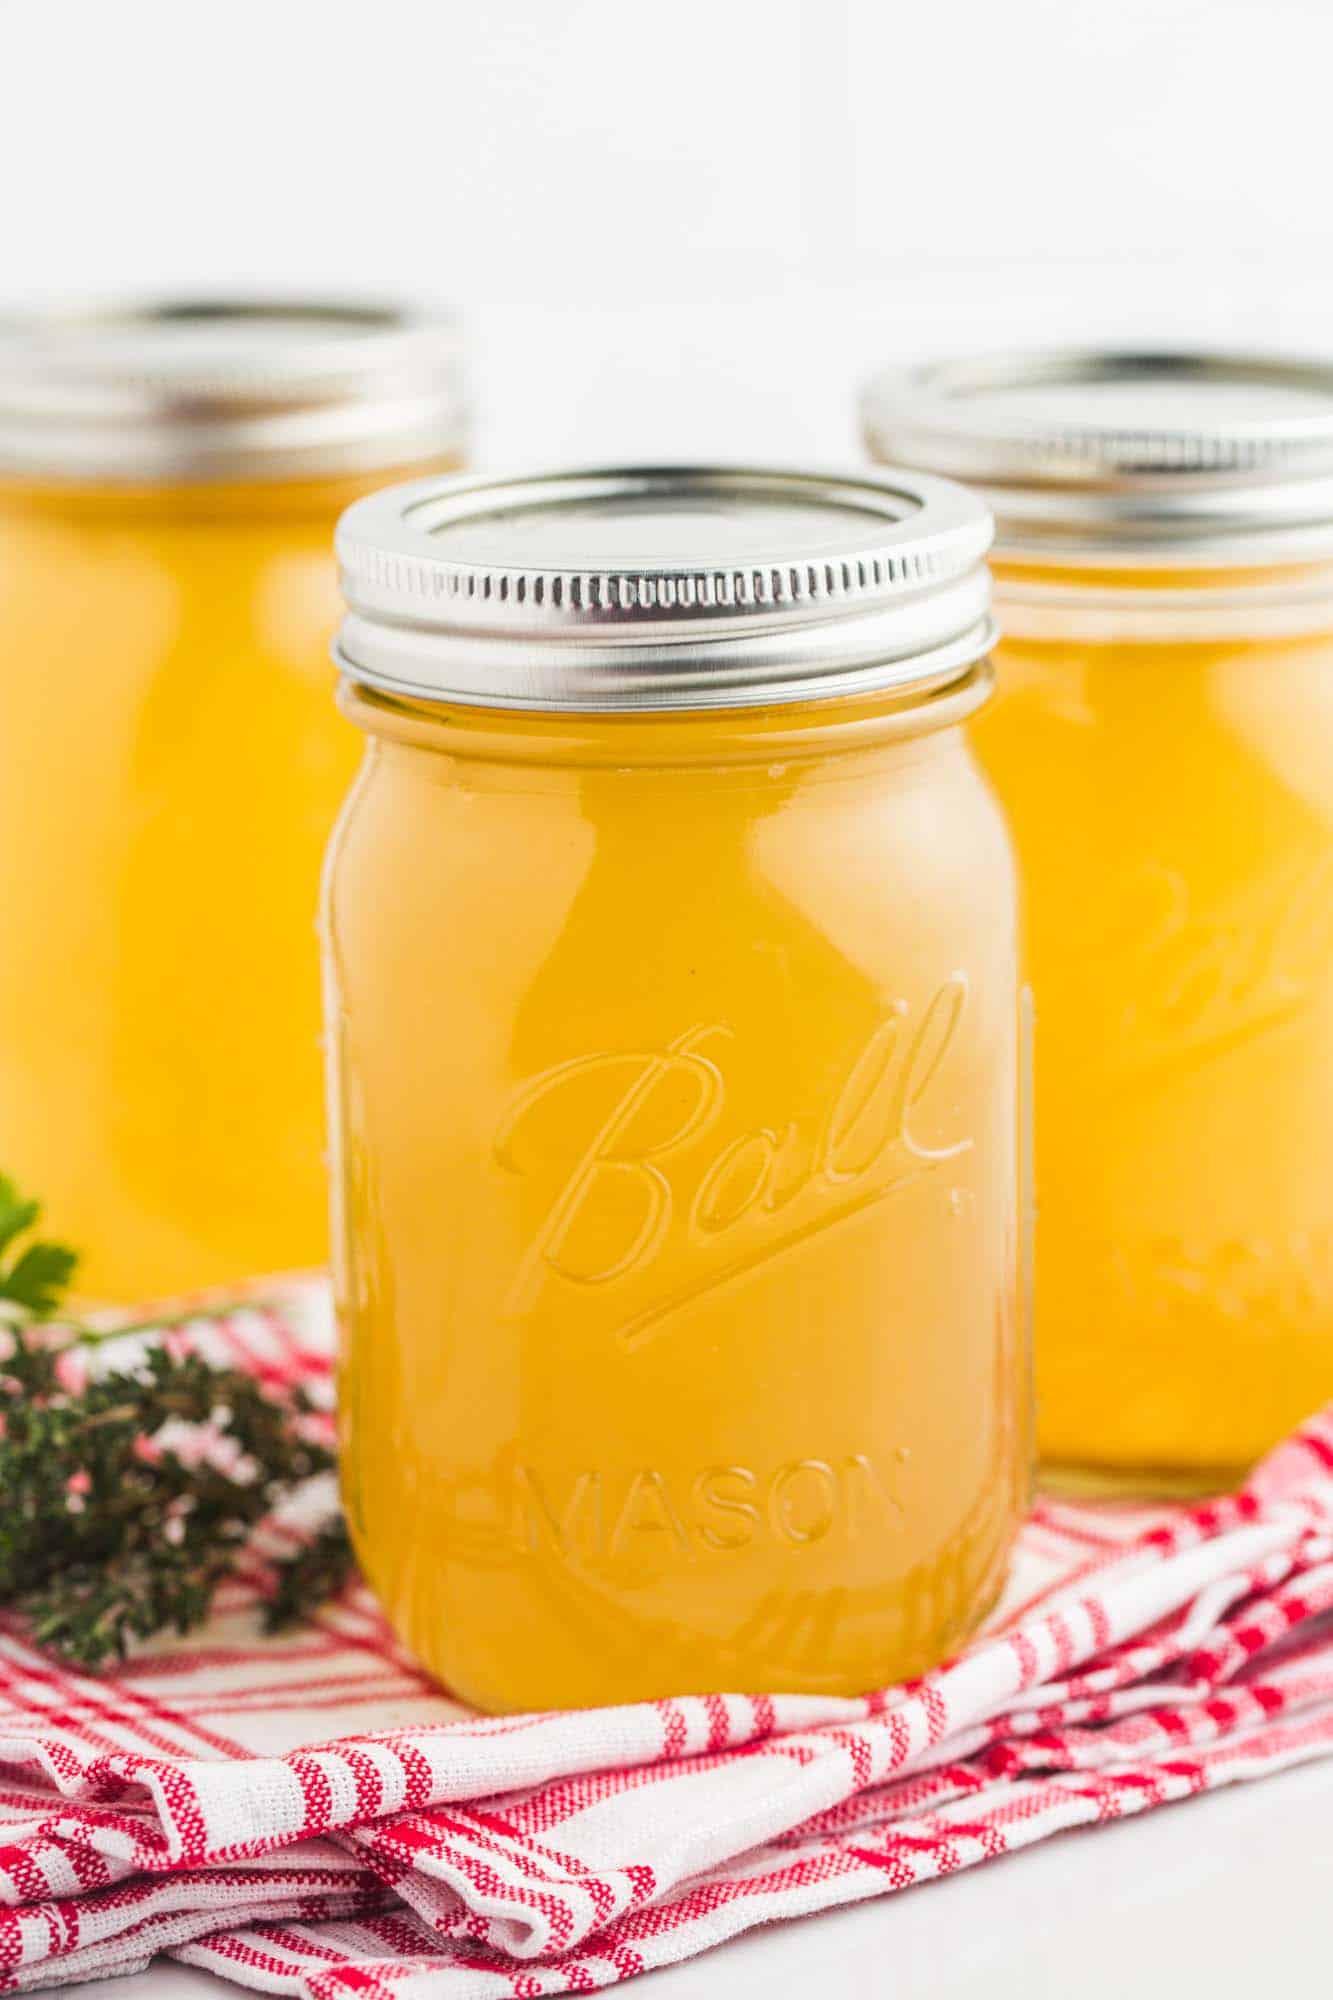
- Strain the Stock: Once your stock has finished simmering (either stovetop or slow cooker), carefully remove the large pieces of carcass and aromatics with tongs or a slotted spoon. Discard them. Then, place a fine-mesh sieve over a large heat-proof bowl or clean stockpot. Line the sieve with cheesecloth for an extra-clear stock, if desired. Slowly pour the stock through the sieve to catch any remaining debris. Do not press on the solids, as this can make your stock cloudy.
- Cool Rapidly: This is a critical food safety step. To prevent bacterial growth, you need to cool the stock quickly. You can do this by placing the pot of hot stock into a sink filled with ice water, stirring occasionally. Once it reaches room temperature, transfer it to the refrigerator.
- Degrease: As the stock chills in the refrigerator, the fat will rise to the surface and solidify into a cap. Once completely chilled (usually several hours or overnight), use a spoon to easily lift and discard this layer of solidified fat. You'll be left with a beautiful, rich, gelatinous stock below.
- Taste and Adjust: Now that your stock is cooled and degreased, it's time for the final taste test. Add salt to your preference, keeping in mind how you plan to use the stock. If it tastes too salty (perhaps from a brined turkey), simply add a bit more water to dilute it.
For more detailed instructions and helpful visuals, check out our companion recipe: Homemade Turkey Stock: Easy Carcass Recipe for Rich Flavor.
Storing Your Liquid Gold and Culinary Uses
Once you've made your glorious batch of homemade turkey stock, proper storage ensures you can enjoy its rich flavor for months to come. And the possibilities for its use are truly endless!
Storage Solutions:
- Refrigerator: Freshly made stock can be stored in airtight containers in the refrigerator for up to 3-4 days. Ensure it's fully cooled before refrigerating.
- Freezer: For longer storage, freezing is your best friend. Turkey stock freezes beautifully for 3-6 months, or even longer without significant quality degradation.
- Ice Cube Trays: For small, concentrated portions perfect for deglazing a pan or adding a splash of flavor to sautéed vegetables. Once frozen, pop them out and store in a freezer bag.
- Freezer Bags: Lay freezer-safe bags flat on a baking sheet to freeze in convenient, thin blocks. This saves freezer space and allows for quicker thawing. Label with the date and quantity (e.g., 2 cups).
- Airtight Containers: Use freezer-safe containers, leaving about an inch of headspace at the top to allow for expansion as the stock freezes.
Culinary Applications:
Your homemade turkey stock is a versatile kitchen staple that will elevate countless dishes. Here are just a few ideas:
- Soups and Stews: The most obvious, yet most rewarding use. From classic turkey noodle soup to hearty lentil stews, your stock provides a robust, flavorful base.
- Gravy Base: The foundation for an exceptionally rich and savory gravy, far superior to anything made with water or bouillon.
- Risotto and Grains: Use it instead of water or vegetable broth when cooking rice, quinoa, or other grains for an added layer of flavor. It's particularly fantastic for mushroom risotto.
- Braising Liquids: Perfect for braising short ribs, chicken, or vegetables, imparting deep flavor as the dish slowly cooks.
- Pan Sauces: Deglaze your pan after searing meats with a splash of turkey stock, reduce it, and whisk in a pat of butter for an instant, restaurant-quality sauce.
- Stuffing/Dressing: Moisten your holiday stuffing or dressing with this flavorful stock for an unbeatable taste.
- Leftover Revitalization: Use it to moisten leftover turkey meat, create a creamy turkey pot pie, or whip up a hearty turkey hash.
Embrace the Richness: Your Culinary Journey Awaits
Don't let that valuable turkey carcass go to waste ever again. Making homemade turkey stock is a rewarding culinary endeavor that brings unparalleled depth of flavor and nutritional benefits to your cooking. It’s a simple, cost-effective, and incredibly satisfying way to honor your holiday meal and transform a humble leftover into a versatile ingredient that will enhance countless future dishes. So, next time you’re carving that bird, remember the liquid gold waiting to be unlocked, and get ready to infuse your kitchen with truly unforgettable flavors.
